Setup Plan Settings
The Plan Settings tab are where the Plan Settings and Plan defaults are stored for new Plans.
Plan Settings
1. To access the Plan Settings tab from the Advisor Portal, click the Settings tab.

2. You can also access the Plan Settings tab by clicking the Advisor Name drop down menu in the top right corner. Select Settings.
Profile Settings
The Settings / Profile tab contains the Personal Details on the Plan Advisor to be used for the Plan(s). The contact information entered will appear on the Participant Enrollment site Greetings and Completed pages and on the Participant Enrollment report. The email address will be used for the Plan Advisor recipient when sending Notifications.
 2. Enter the Advisor Contact information to be used for the Plan(s). This information will be displayed to Participants on the Greetings page of the Enrollment site when Advisor is selected for Presentation Type on the Settings / Plan Defaults tab.
6. Select Save to accept the updates made to the Personal Details fields or select Cancel to void your entries. Top of page will display message 'Data Saved' when your updates are saved.
White Label Settings
The Settings / White Label tab contains the Plan(s) White Labels. A White Label is used to customize the display on the Enrollment site. Note: The White Label settings can be edited but will not automatically change for any existing Plans previously setup.
1. Click the White Label tab. The White Labels screen is displayed.

2. To Create a new White Label to be used by the Plan(s) select the Add button. For more information on setting up White Labels see Setup White Labels
3. To Edit or Delete existing White Labels as needed, select the Actions drop-down for the desired White Label and select Delete to remove the White Label or Edit to update the White Label.
4. Any updates made to the White Label fields are auto saved.
RTQ Settings
The Settings / RTQ tab contains the Risk Tolerance Questionnaire, (RTQ) to be used by the Plan(s). The RTQ is used when the Risk Score Fund Path (Help Me Choose) is selected for Plan(s). The RTQ can be customized as needed. Note: The RTQ settings can be edited but will not automatically change for any existing Plans previously setup. Note 2: An RTQ cannot be deleted if it is in use by a Plan.
1. Click the RTQ tab. The RTQ screen is displayed.

2. Add a new RTQ or copy the existing iJoin Default Survey to be used for the Plan(s).
- For more information on setting up an RTQ see Setup A Risk Tolerance Questionnaire
- To see the iJoin Default RTQ see iJoin Default Risk Tolerance Questionnaire
3. Any updates made to the RTQ fields are auto saved.
Users
The Settings / Users tab provides the ability to manage the users for your Plans. You can create new users or edit existing users.
 1. To add a new user, select Create New User.
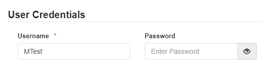
- Add the Personal Details (First Name, Last Name, link to a Headshot, assign a unique Username and password)
- Toggle Make iJoin System Administrator to Yes if the new user will be an administrator.
- Toggle Use Two Factor Authentication to Yes if Multi Factor Authentication should be enabled.
- ACT Permissions – check boxes if the user will be able to Create Email Campaigns and/or Run Reports.
- Plan Associations – select either All plans or Select Plans. If Select Plans is chosen, then a box of selectable plans will be displayed. Place a ‘check’ in the left column for all desired plans for the user.
- Select Save when completed or Cancel to return to the mail Users page
2. To change an existing User, select the username from the available list of users. Make the desired changes to the fields above and select Save.

Notifications Settings
The Settings / Notifications tab contain the Notifications to be used for the Plan(s). Notification(s) are sent in an email to (various) Plan Contacts and contain reports of the changes made on the Participant Enrollment site. The email contents and recipients can be customized.
1. Click the Notifications tab. The Notifications screen is displayed.

2 Add, Edit, Copy or Manage Plan Associations for the Notifications to be available to the Plan(s).
2.1 You can alphabetically sort the list of Notification Name and Even Triger fields by selecting the header field. Up or Down arrow will be displayed indicating the sort selected.
2.2 Searching for a specific notification can be done by typing a value in the box below Notification Name field.
2.3 For more information on setting up Notifications see Setup Notifications
2.4 For information on setting up Notification recipient email addresses see Setup Plan Contacts in Relius
3. Any changes made to the Notifications fields are auto saved.
Batch Updates
The Settings / Batch Updates tab provides the ability to make changes to either all Plans or all Users for a specific number of predefined fields. Select the Batch Update tab to see the available options.

- Select Type drop-down to identify whether User or Plan updates are being made.
- Once selected, the Area/Field drop-down will be populated with the associated User / Plan fields that can be changed.
- Once the field is selected, Set Value To will be populated with the optional value(s) for selection.
- User / Plan Selection – Select whether all Users / Plans should be updated or only Select Users / Plans should be updated.
- Click the Perform Update button to apply changes.
Plan Defaults Settings
The Settings / Plan Defaults tab contains the default settings to be used for new Plans. Note: The Plan Defaults settings can be edited but will not automatically change for any existing Plans previously setup. If the Plan is already setup, changes can be made on the Plan level on the Plan Details / Enrollment Setup tab.
1. Click the Plan Defaults tab. The Plan Defaults screen is displayed.

2. Select the Enrollment Experience Type to be used for the Plan(s). Options are iJoin Standard or LDI Managed Accounts for (MAP). For more information on Experience Type see What Is Enrollment Experience Type?
3. Select the Greeting Type to be used for the Plan(s). The options are Primary Advisor (singular or plural) or Generic. For more information on Greeting Type see What is Presentation Type?
4. Select the White Label to be used for the Plan(s). For more information on White Labels see Setup White Labels
5. Turn On or Off the option Allow balance transfers to changed investment allocations on the Enrollment site. Note: This default can also be switched on or off for an individual Plan see Add New Plans.
6. Turn On or Off the option Provide Current Paycheck Estimator on the Enrollment site. For more information see Setup Enrollment.
7. Turn On or Off the option Require Cell Phone Number Entry on the Enrollment site. When this field is toggled On, the Participant is required to enter a cell phone number. When this field is toggled Off, the Participant has the option to enter a cell phone number on the Enrollment site.
8. Turn On or Off the option Display Plan Op-Out on the Enrollment Site. If the toggle switch is on for the plan, the "I don't want to enroll" opt-out button will be provided within the enrollment experience and if the user clicks on this button (and confirms their decision), a 0% deferral will be sent to Relius in all circumstances. If the toggle switch is not turned on for the plan, the user will not see the "I don't want to enroll" option within the enrollment experience.
9. Turn On or Off the option Permits Edits of Existing Name Values. When this field is On, the entered name data is fed back to the recordkeeper.
10. Turn On or Off the option to Collect Beneficiary Information on the Enrollment Site. For more information see Setup Enrollment.
11. Any updates made to the Plan Setup Defaults fields are auto saved.
Next, setup Plan Details for Plan level specifications, Contacts, Enrollments, Investment Paths, Notifications and to activate the Plan for Enrollment.